Showing posts with label collages. Show all posts
Showing posts with label collages. Show all posts
Tuesday, May 19, 2009
Thursday, May 14, 2009
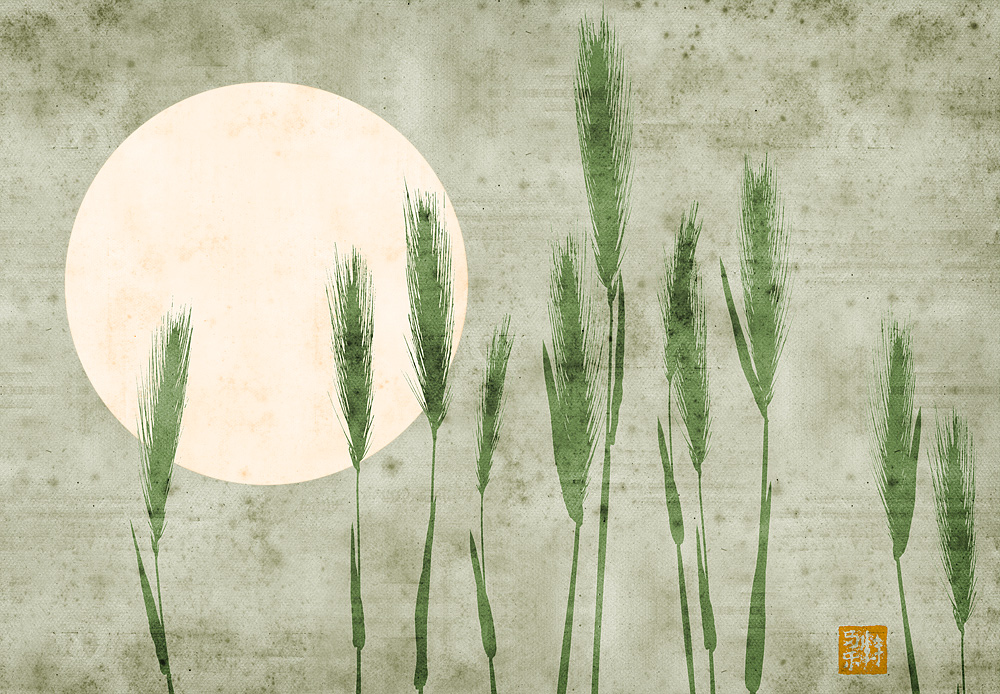
moon grass
collage of my two photos - recent of a full moon and today's of grass against murky sky + favourite scanned old paper texture
another version on flickr
a big square crop of panoramic version can be downloaded from hiero.ru (7.9 M), for approximately one week
Friday, September 12, 2008

Sunday, September 07, 2008
collaging pen-and-ink drawing with paper textures
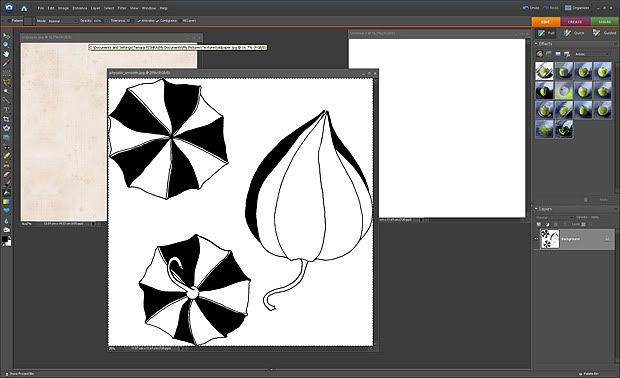
To assemple a collage like one below, I use pen-and-ink drawing on paper, which I scan. All lines should be completed, all segments of the drawing fully encircled by lines
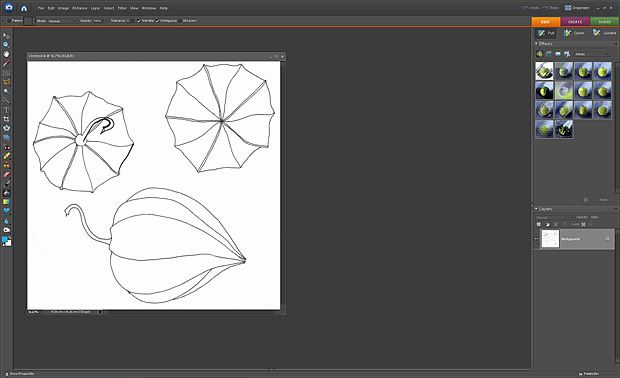
after maximizing the contrast and removing stray color, the scanned lines are never smooth

since I don't have full Photoshop (too expensive), I can't use pen tool to make the lines smooth. So I use the cutout filter first, and then use levels (Ctrl_L) to make the drawing black and white (after cutout it will have some grey areas). To make the drawing a bit softer, do a select of black or white areas, refine the edge as you wish, making the lines either thicker or thinner, and feather the edge, then use levels to adjust the edges

и потом догоняем уровнями то, что получилось серым до белого. где-то я уже описывала
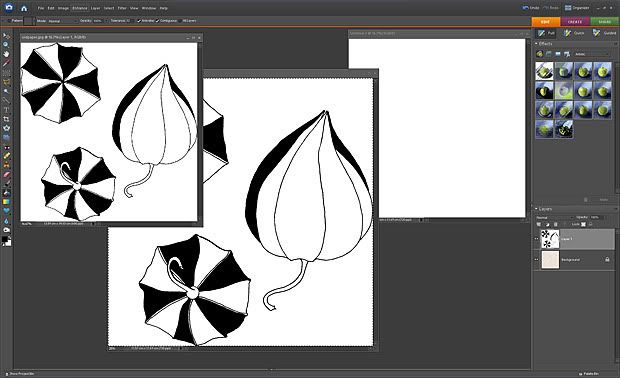
now, open two more files files - one with choozen texture, left (I tend to use my collection of old scanned old paper) and one with simple white background (right). for convinience, make them same size as the drawing
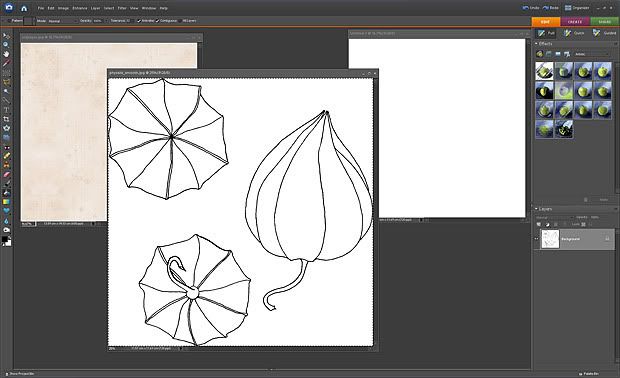
now choose some segments in the drawing. because we are filling the drawing with texture in few steps, it makes sense to choose those segments that are "further" away from the viewer. other segments will lay on the top
copy the whole thing onto the file with texture (Ctrl-A, Ctrl-C, move over to the texture file - Ctrl-V). This creates a new layer with our partially filled drawing on the top of the original texture
now, choose and of the black areas in the drawing with magic pen. add the rest of black areas with "similar". move to the lower layer, one with texture, and copy the selected area from there (ctrl-c). move onto the blank file on the right. drop the selected areas of texture there (Ctrl-V)
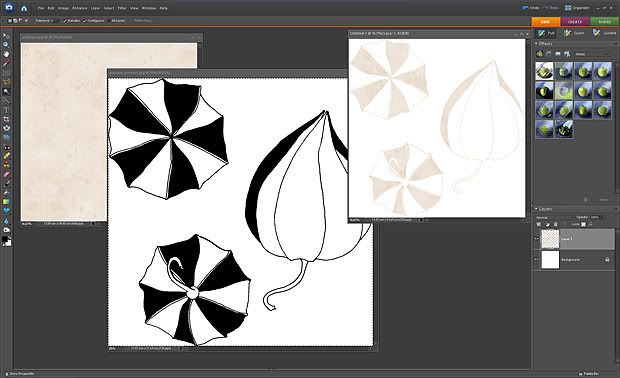
Now go to the original drawing in the middle, and remove the black areas (Ctrl-Z and many times as necessary).
Repeat the process from filling with black to clearing the black areas, choosing different segments every time
now the complete draing is filled with textures, and segments are spread in a
few different layers. Using levels(ctrl-L) and color tool (ctrl-u) in every layer separately, adjust the light and color for all of them (can be changed at any time, don't worry)
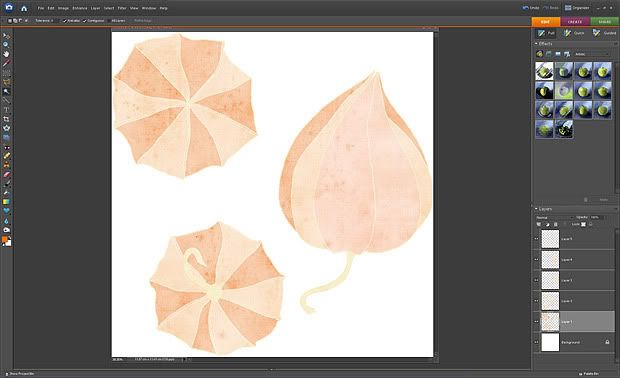

Now, using burn and dodge tools, and working on each layer separately, add shadows (burn) and highlights (dodge)
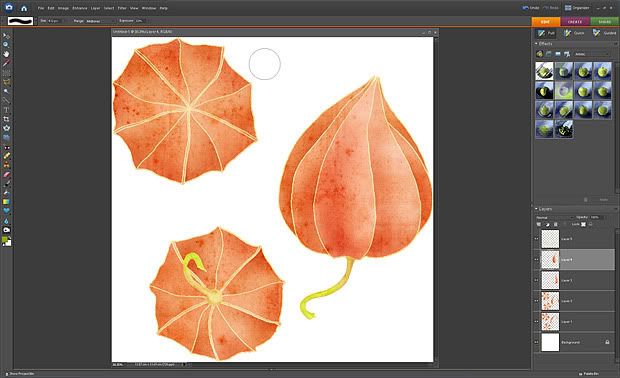
Now, because we've started with line drawing, there are many layers of multicolored lines over each line of the original drawing. I used to leave those as is - see http://hiero.ru/2099348, http://hiero.ru/2097030, http://hiero.ru/2096677
Now I remove the oven that don't belong to each level with eraser
Once the result satisfy you, merge the layers. The resulting pic on white background can be used as is, or dropped on a top of some texture. The handwritten legend here was also scanned and dropped on the top as described above
after maximizing the contrast and removing stray color, the scanned lines are never smooth
since I don't have full Photoshop (too expensive), I can't use pen tool to make the lines smooth. So I use the cutout filter first, and then use levels (Ctrl_L) to make the drawing black and white (after cutout it will have some grey areas). To make the drawing a bit softer, do a select of black or white areas, refine the edge as you wish, making the lines either thicker or thinner, and feather the edge, then use levels to adjust the edges
и потом догоняем уровнями то, что получилось серым до белого. где-то я уже описывала
now, open two more files files - one with choozen texture, left (I tend to use my collection of old scanned old paper) and one with simple white background (right). for convinience, make them same size as the drawing
now choose some segments in the drawing. because we are filling the drawing with texture in few steps, it makes sense to choose those segments that are "further" away from the viewer. other segments will lay on the top
copy the whole thing onto the file with texture (Ctrl-A, Ctrl-C, move over to the texture file - Ctrl-V). This creates a new layer with our partially filled drawing on the top of the original texture
now, choose and of the black areas in the drawing with magic pen. add the rest of black areas with "similar". move to the lower layer, one with texture, and copy the selected area from there (ctrl-c). move onto the blank file on the right. drop the selected areas of texture there (Ctrl-V)
Now go to the original drawing in the middle, and remove the black areas (Ctrl-Z and many times as necessary).
Repeat the process from filling with black to clearing the black areas, choosing different segments every time
now the complete draing is filled with textures, and segments are spread in a
few different layers. Using levels(ctrl-L) and color tool (ctrl-u) in every layer separately, adjust the light and color for all of them (can be changed at any time, don't worry)
Now, using burn and dodge tools, and working on each layer separately, add shadows (burn) and highlights (dodge)
Now, because we've started with line drawing, there are many layers of multicolored lines over each line of the original drawing. I used to leave those as is - see http://hiero.ru/2099348, http://hiero.ru/2097030, http://hiero.ru/2096677
Now I remove the oven that don't belong to each level with eraser
Once the result satisfy you, merge the layers. The resulting pic on white background can be used as is, or dropped on a top of some texture. The handwritten legend here was also scanned and dropped on the top as described above
Saturday, September 06, 2008

Friday, September 05, 2008
ipoemea

it's raining and it's raining, and my morning glory choose this moment to finally start blooming. odd that.
had no choice but to draw and collage instead of photograpy
Subscribe to:
Posts (Atom)


